Teaching Paper Sloyd
 When we last talked about sloyd, we explored the principles to be employed while teaching it. This article assumes that the reader understands the principles. There are many ways that sloyd philosophy and Miss Mason’s philosophy agree and complement each other; however, the way Mason used sloyd in her programmes is what specifically concerns us, not sloyd for the sake of sloyd. Though it has received little attention until recently, sloyd was a very important part of the feast offered to the children. From form 1 through form 4, sloyd was consistently scheduled in Work, along with other handicrafts. Today I am going to share Mason’s plan for form 1, tell you how to teach it, and go over some of the benefits of following Mason’s lead. Although this is the sequence suggested for form 1, paper sloyd is a skill-based subject; therefore, the same sequence is suggested for older children getting started. Older children can be expected to progress faster.
If you have done any investigation into sloyd, you have probably seen Ednah Anne Rich’s book, Paper Sloyd, A Handbook for Primary Grades. Based on the projects completed, it is probably very much like the first book listed in the earliest available programmes, Carton Work, by C.G. Hewitt. As far as I can tell this book is not accessible, but you can see the similarities in projects completed here. In the later programmes, we see that they switched to Paper Modelling, by M. Swannell. I was able to locate this book and through it, I have made some surprising discoveries about the way sloyd progressed through form 1. Because this was the last book used in the programmes from Mason’s lifetime and, as my friend Richele likes to say, “Mason had her fingers on the pulse of the publishing world,” I think it is fair to conclude that Mason found Swannell’s book to be better suited to her goals for paper sloyd. My recommendations for teaching form 1 are based on insight from this book, combined with Parents’ Review articles, the programmes, and my own experience.
Handicrafts are one of my favorite parts of a Charlotte Mason education. I first considered sloyd philosophy when I was prepping for a handicraft workshop a few years ago and I came across the article, “On Some Aspects of Slöjd,” used as the basis for the first post in this series. I immediately loved the ideas and principles, but my children were still very young and we were working on different handicrafts at the time, so although I continued to research and consider the principles of sloyd, I didn’t seriously consider the implementation of sloyd until this past school year.
I began using Rich’s book as written with my forms 1b and upper 1a students. Very early on I was struck by a contradiction in principles. Although Rich’s book is written for grades 1-3, my first year student was not able to do all of her work on her own with perfect execution. Making a perfect square, measuring, holding the ruler steady to draw the line, and cutting the line perfectly with scissors was out of her compass. Starting with an imperfect square prevented her from perfectly executing the rest of the project. But the instructions said she should measure and cut her own square and I didn’t know of any other resources, so I continued to have her do it and I helped her to hold the ruler and draw the line. My third year student was depending too much on me to translate the instructions into simpler language and though she enjoyed the projects, she didn’t feel confident enough to work through a project on her own. I believed that it was probably only a matter of practice and experience until I came across an article entitled “Cardboard Sloyd” in L’Umile Pianta. This article opened my eyes to the possibilities sloyd held and the areas where we were failing. It also drove me to a deeper study of the way sloyd was meant to be taught and the progression in the P.U.S. programmes.
Form 1b
Charlotte Mason was always in search of the right books for her students (1989c, p. 177), so I believe it is significant that Carton Modelling was switched out for Paper Modelling in form 1a and replaced by Paper Folding by H.G. Patterson in form 1b. This change led me to believe that the P.U.S. noticed, as I did, that cutting and measuring squares without help may be outside the abilities of many six-year-olds. It could also mean that the habit of perfectly executing neat and well-placed folds was compromised by the imperfectly-cut squares. Mason says that when a child is allowed to present imperfect work “his moral sense is vitiated, his eye is injured” (1989a, p. 160). Whatever the specific reasons for the change, the fact that there was a change leads me to believe that this change was meant to better serve the needs of these young pupils and better prepare them for later sloyd projects.
I have already mentioned that I found Rich’s book to be too advanced for my form 1b student to do the work entirely on her own. I noticed that cutting an imperfect square compromised the placement of her folds and undermined her ability to perfectly execute the project. But beginning with paper folding gives the student the opportunity to master skills slowly and gradually. He can see where his corners are not lined up; he sees the crease left when a fold is not carefully made and must be redone. Sloyd is meant to be self-correcting. C. Russell says:
… in hand-work there is nothing to lead to mental confusion—the aim is clear, and the boy knows when he has reached it; idleness, too, stands self-condemned, it cannot be concealed … by specious half-truths or slovenly make-believe; each must work for himself … failure also is self-evident, and often the reason for failure. (1894, pp. 328-329)
If only given work he is capable of executing perfectly, the child becomes comfortable controlling the paper and takes pride in his attention to detail. He learns to read the diagrams for himself, gaining confidence in his abilities and taking ownership of his work.
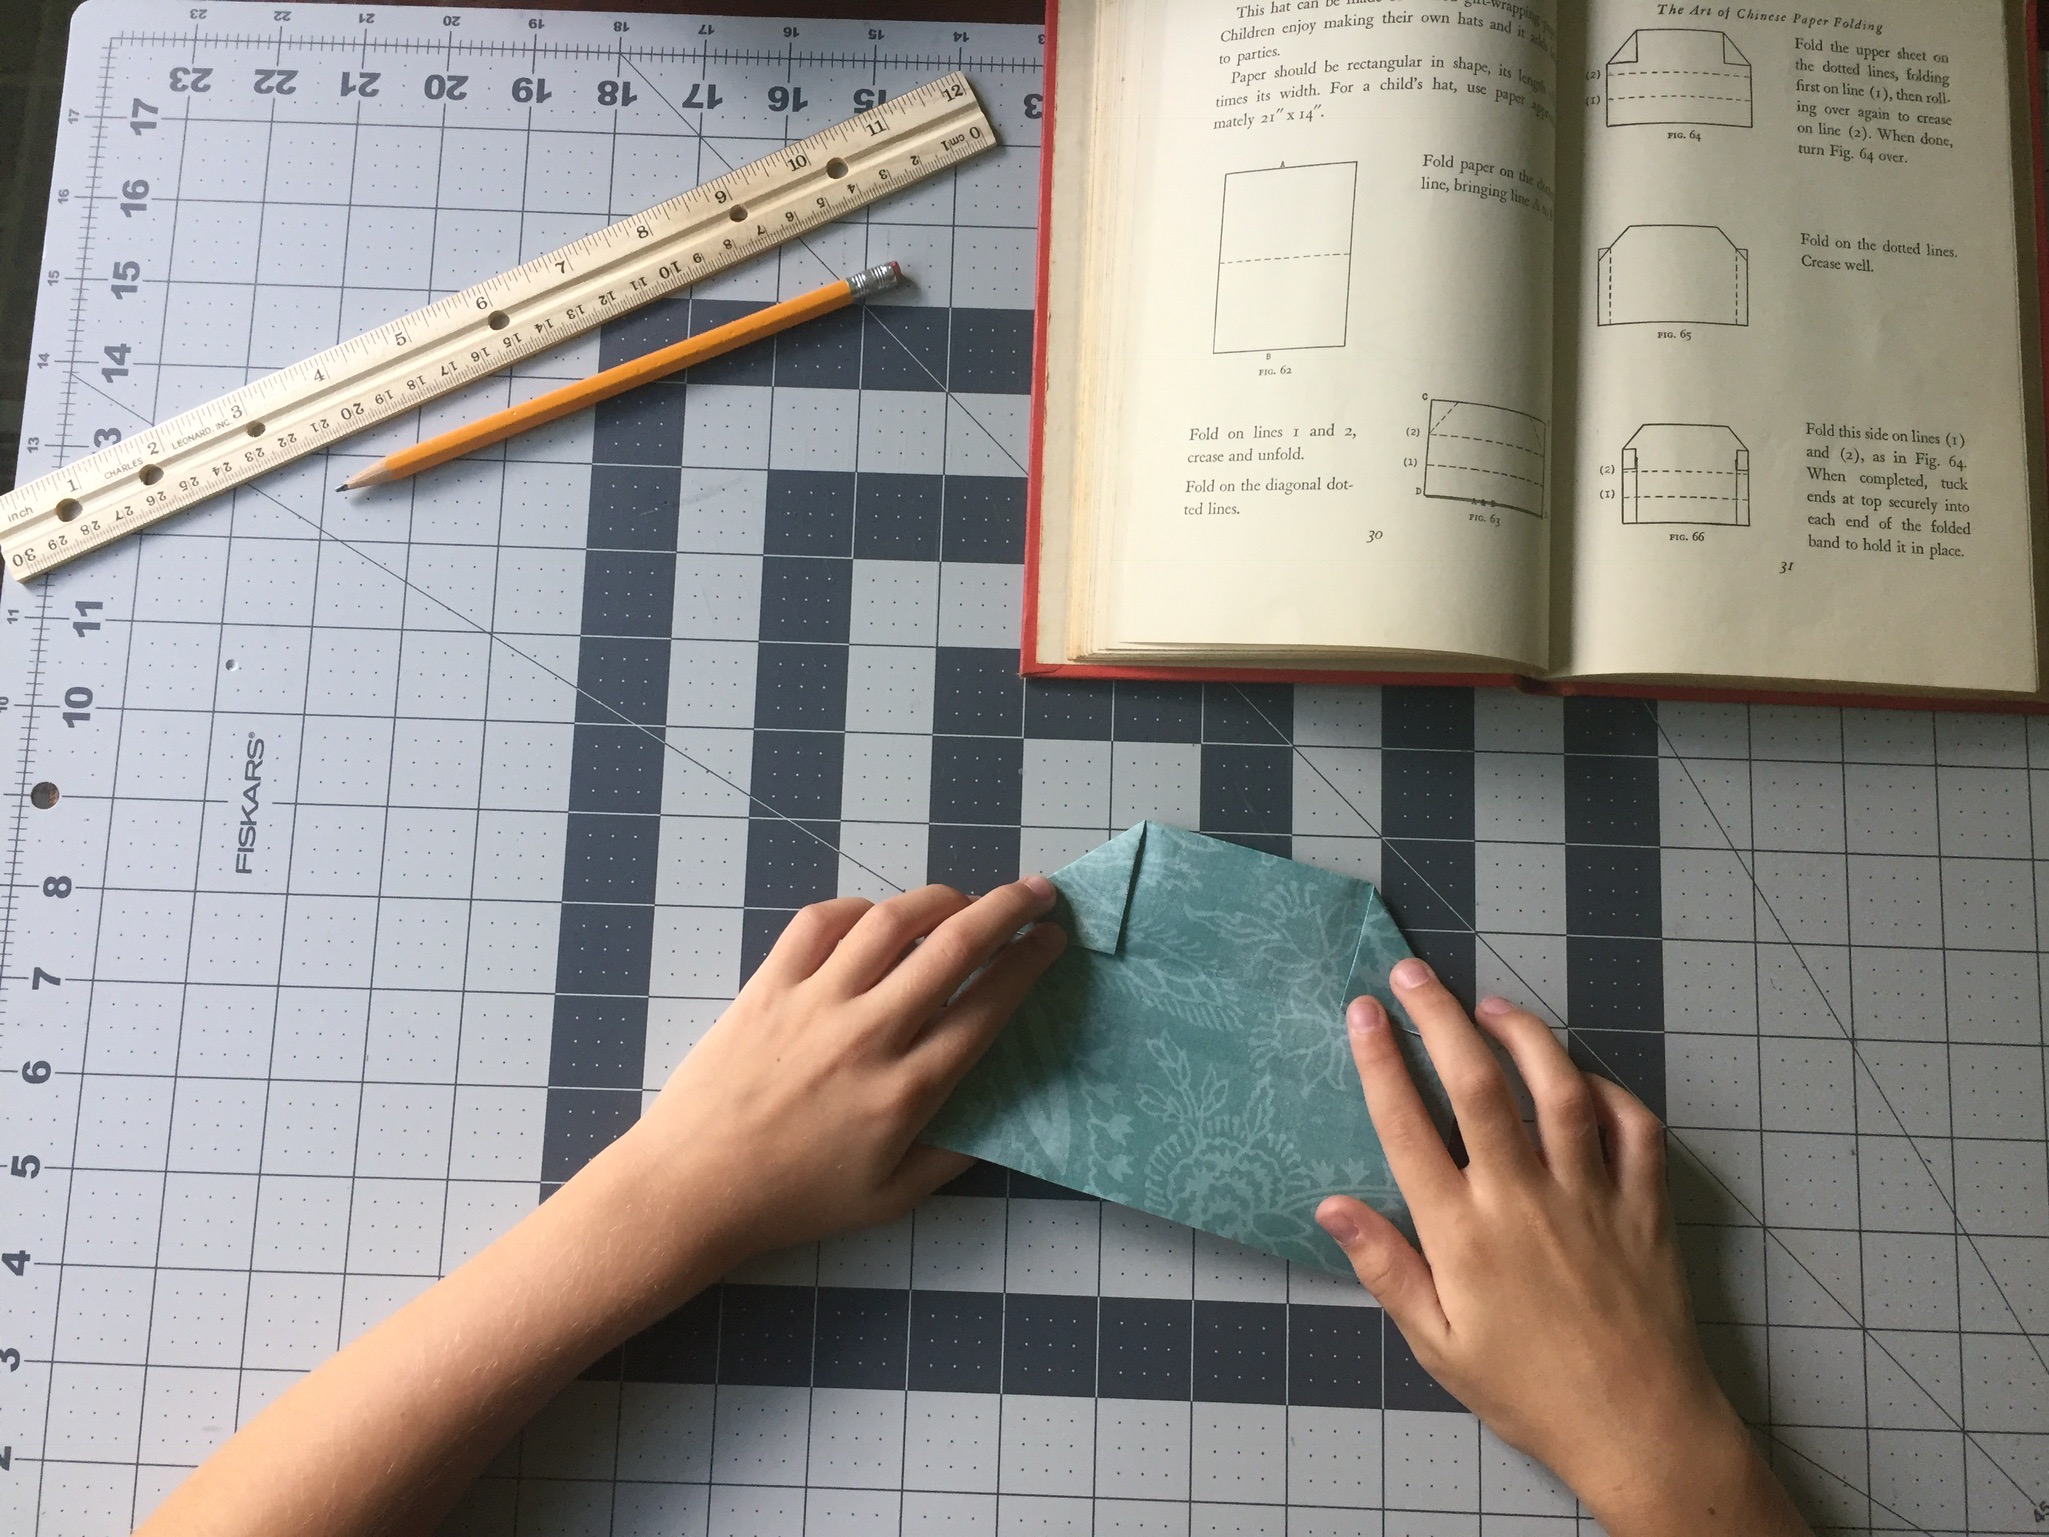
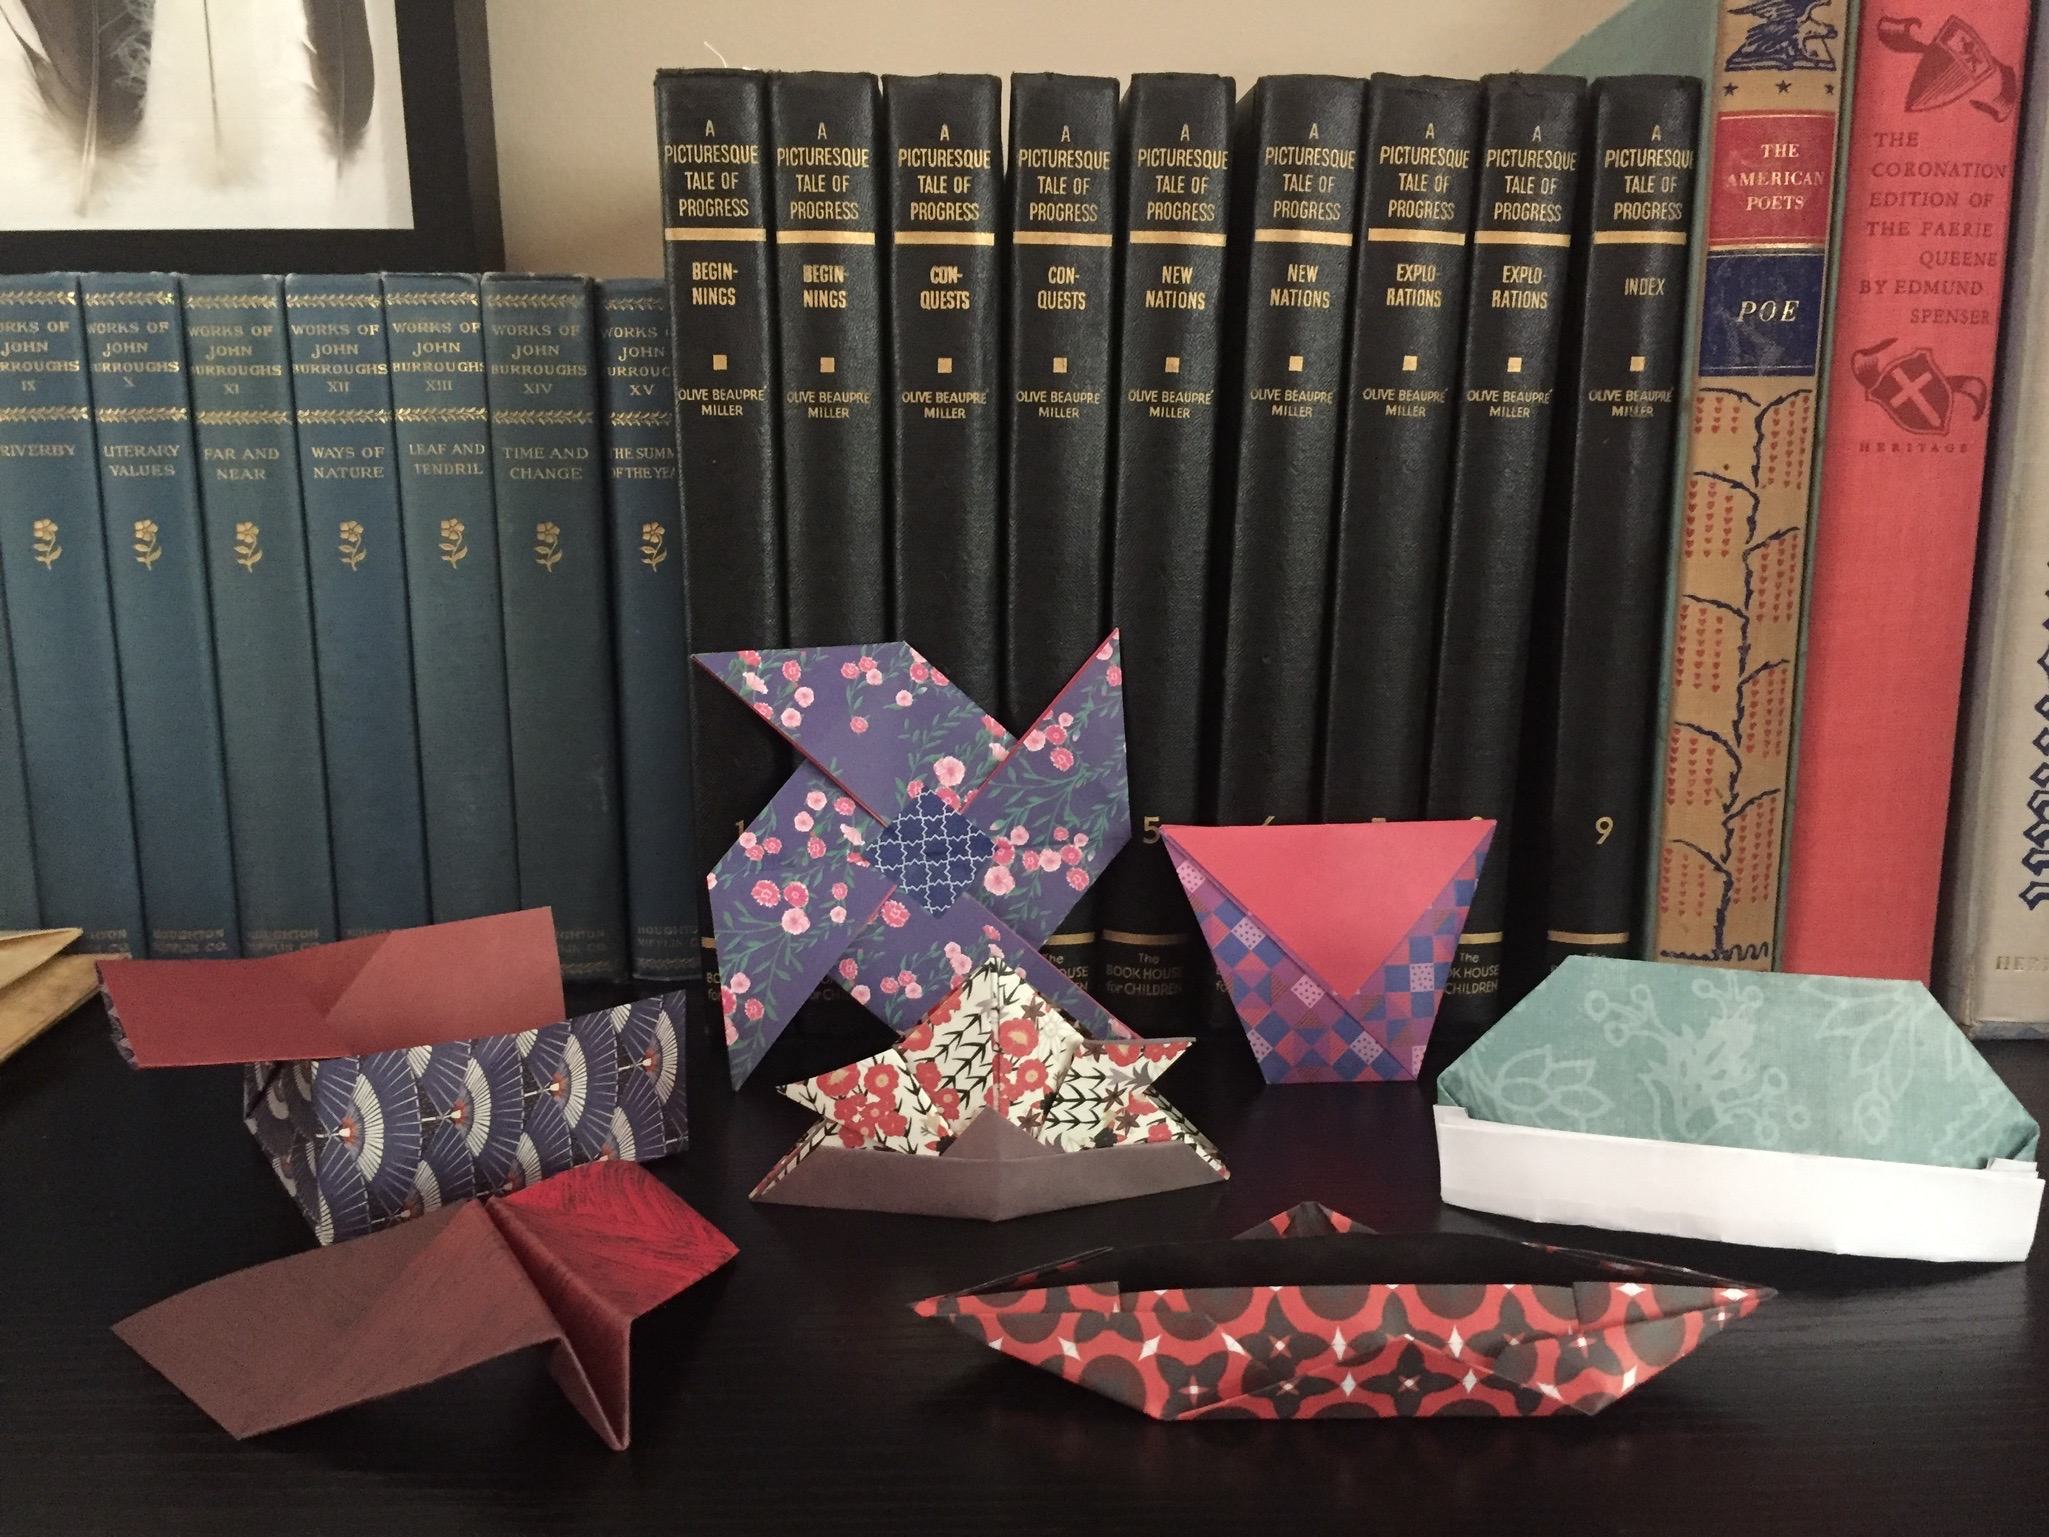 So if Paper Sloyd is out, what do we do instead? The most logical choice is origami, but origami done using sloyd principles and with guidance from the programmes. Projects should be useful in some way, progressively build skills, and be of an appropriate level of difficulty. Regular origami paper can be used in 6 x 6” squares, in bright colors, and beautiful prints. Some ideas for projects include bookmarks, cups, boxes, envelopes, wallets, bowls, boats, hats, letter folds, paper airplanes and Christmas ornaments (which can give a lot of freedom). If you would like a book to give some direction, I enjoy using The Art of Chinese Paper Folding for Young and Old, by Maying Soong.
Form 1b students would have done ten projects from the book Paper Folding and two original projects per term, about one project completed per week. It is possible that the projects were done more than once, but it isn’t necessary to do if it has been well done with the child’s best effort. Original projects would likely be variations or combinations of previous projects made. As long as edges are lined up and folds are neat, there should be no criticism of the original models. And because we do want to encourage careful work, I caution the reader against allowing the student to have free access to origami materials. The quality of the work will go down and the quantity will go way up. This is one area where I hope my personal experience doing the wrong thing will prevent the reader from making the same mistake.
Form 1a
Moving on to Form 1a, things get a little more exciting. Reading Paper Modelling was a revelation. It is perfectly in line with the gradual building up of skills. I was surprised again that the instructions don’t call for the child to cut out his own square. Instead he begins with a square. Rather than measuring out the lines for the project, the original square is folded into 16 equal squares. The creases from those folded squares serve as the guides for the cutting line. Here is the part I found very exciting: the children don’t use scissors to cut; they use a knife and they use it freehand! A ruler is used to mark the line and then the child, at seven years old, is allowed a sharp blade to cut paper with no ruler or guard to guide and protect him. Russell says, “…carelessness and inattention bring their own swift punishment—sometimes, though rarely, with blood…” (1894, p. 329). I can’t think of a better way to ensure careful work and attention.
I first learned that students cut using knives in the article “Cardboard Sloyd.” The author, Miss R.A. Pennethorne, talks about the idea of drawing a straight line of a precise length using only the eye and hand. No “crutches” as she calls them, referring to rulers. I believe training for this skill begins by using a blade to cut along a ruled line or crease in form 1a. If you have never tried using a blade to cut along a straight line, I encourage you to give it a try. It is actually easier to cut straight with a blade than with scissors. But it requires control and concentration. We don’t often think about it, but there are many physical habits we train into the movements of our bodies. Over time, the hand is trained by habit to move in a straight line. Movements that are at first deliberate and careful become natural and easy. Pennethorne is very clear about the importance of cutting in this way:
In this, as in everything else, of course practice makes perfect, and it seems as if there should be very little more difficulty for a child in learning to draw a straight line of exactly the length he requires (controlling his hand by will and eye alone), than there is in learning to form neatly and well the lines and curves of all the letters of the alphabet, which must present such enormous difficulty to a child until he has all the muscles of his hand well under control. In the case of children beginning Sloyd when they are older, say at twelve or more, they, being unaccustomed to drawing and measuring without help, must depend to a great extent on “crutches” in the actual drawing of the diagram, but let the “crutches” be used only for the diagram. The cutting must be guided by the line and eye alone, or Sloyd loses more than half its value. (1906, p. 4)
Training in precise length is also learned by practice. Through form 1b the child has been primarily using a square of the same size. He should already know the feel of 6 inches, feeling the length of the crease under his fingers over and over. He already has a concept of proportion from paper folding and should be measuring and weighing concrete items around the house. Miss Mason says:
Let him not only measure and weigh everything about him that admits of such treatment, but let him use his judgement on questions of measure and weight. (1989a, p. 260)
With a little bit of deliberate training and practice, the child is absolutely capable of gaining these skills. During my training in hairdressing at the Vidal Sassoon Academy, a cosmetology school with a very distinct and precise philosophy, we were given instructions very similar to the ones described by Mason and Pennethorne. We learned to accurately measure length by sight and by feel through practice. It is a sense we are all capable of learning; however, learning these skills as a young child is easier and comes more naturally than learning them as an older child or adult.
 Paper Modelling also surprised me in the choice of models. Sloyd is usually pretty utilitarian; Swannell’s book is fun. Models include doll house furniture and toys, in addition to the usual boxes and envelopes. This is a deliberate choice by the author:
If children learn to use the ruler in the construction of some desirable object, they will be helped by interest to become more skillful and accurate, while increase in skill will be rewarded by a sense of power and more satisfactory results. (Swannell, n.d., Introduction)
While still following a definite progression of method and skill, following the principles of sloyd, the choice of models also allows for more creativity from our young workers. Miss Swannell instructs us thus:
It should be remembered that while the constructive impulse is stimulated by suggestion, it is easily inhibited by over direction. As soon as possible imitation should give way to original effort. The best means of making an object, should, from the earliest, be talked over with the children, and the finishings—decoration or cutting of edges—should be left to individual taste. (n.d., Introduction)
Miss Swannell makes a point of saying not only that models should be shown to the child and offered for examination and deconstruction, but also that the models made by the teacher should be as plain as possible so as not to inhibit the creativity of the student:
They examined a large model, which was then opened to show the plan… In all cases where it is desirable to show a model, the plain, undecorated one should be chosen, and the children invited to suggest alterations or decoration. (n.d., Introduction)
Wrapping up what we have learned from Swannell’s Paper Modelling, we can conclude that form 1a students:
- Should be using a knife to cut their paper
- Should be consciously noticing length and measuring not only in sloyd, but at every opportunity
- Should not measure out their own starting square (at least in the beginning)
- Should be allowed some creativity in finishings touches
Now we are going to see how we can apply these lessons to Ednah Anne Rich’s book.
Of everything I have said about sloyd, the following is usually the most controversial: give your child a previously-cut square to start. As with many other subjects that use a textbook, we should think of the book as a resource, but apply Miss Mason’s philosophy and methods first and foremost. If we break down the skills we are working on in pieces, I think it makes perfect sense that measuring and cutting the starting shape is something to be worked up to, not started with. This is an area where the teacher must look at the individual child to see where he is in the progression of his skills. Remember, teaching must be individual. It is not a rule of sloyd that the second year child measure and cut his own square. If the child is ready, he should be able to do it completely with his own hands.
Coming from paper folding, the first three projects in Rich’s book will teach the student how to hold a ruler steady while moving the pencil along the edge, to fold using pencil marked lines as a guide, and to control a hole puncher so that his holes line up precisely where he means them to. Done slowly and carefully, that is work enough for a 20 minute lesson. The models that follow will give opportunity for more precise practice in measuring and will begin practice in cutting.
Miss Rich recommends the use of scissors; the books used by the P.U.S. all recommended knives. They were using actual short sloyd knives, but an inexpensive and accessible modern replacement is a craft knife. Not only is it easier to cut neatly and straight, it also encourages more careful and thoughtful work. It is, of course at the discretion of the parent whether or not her child is mature enough to handle a craft knife safely, and the parent should still supervise the usage and the proper storage of the craft knife; but I believe most children coming into form 1a are mature enough to use a craft knife responsibly.
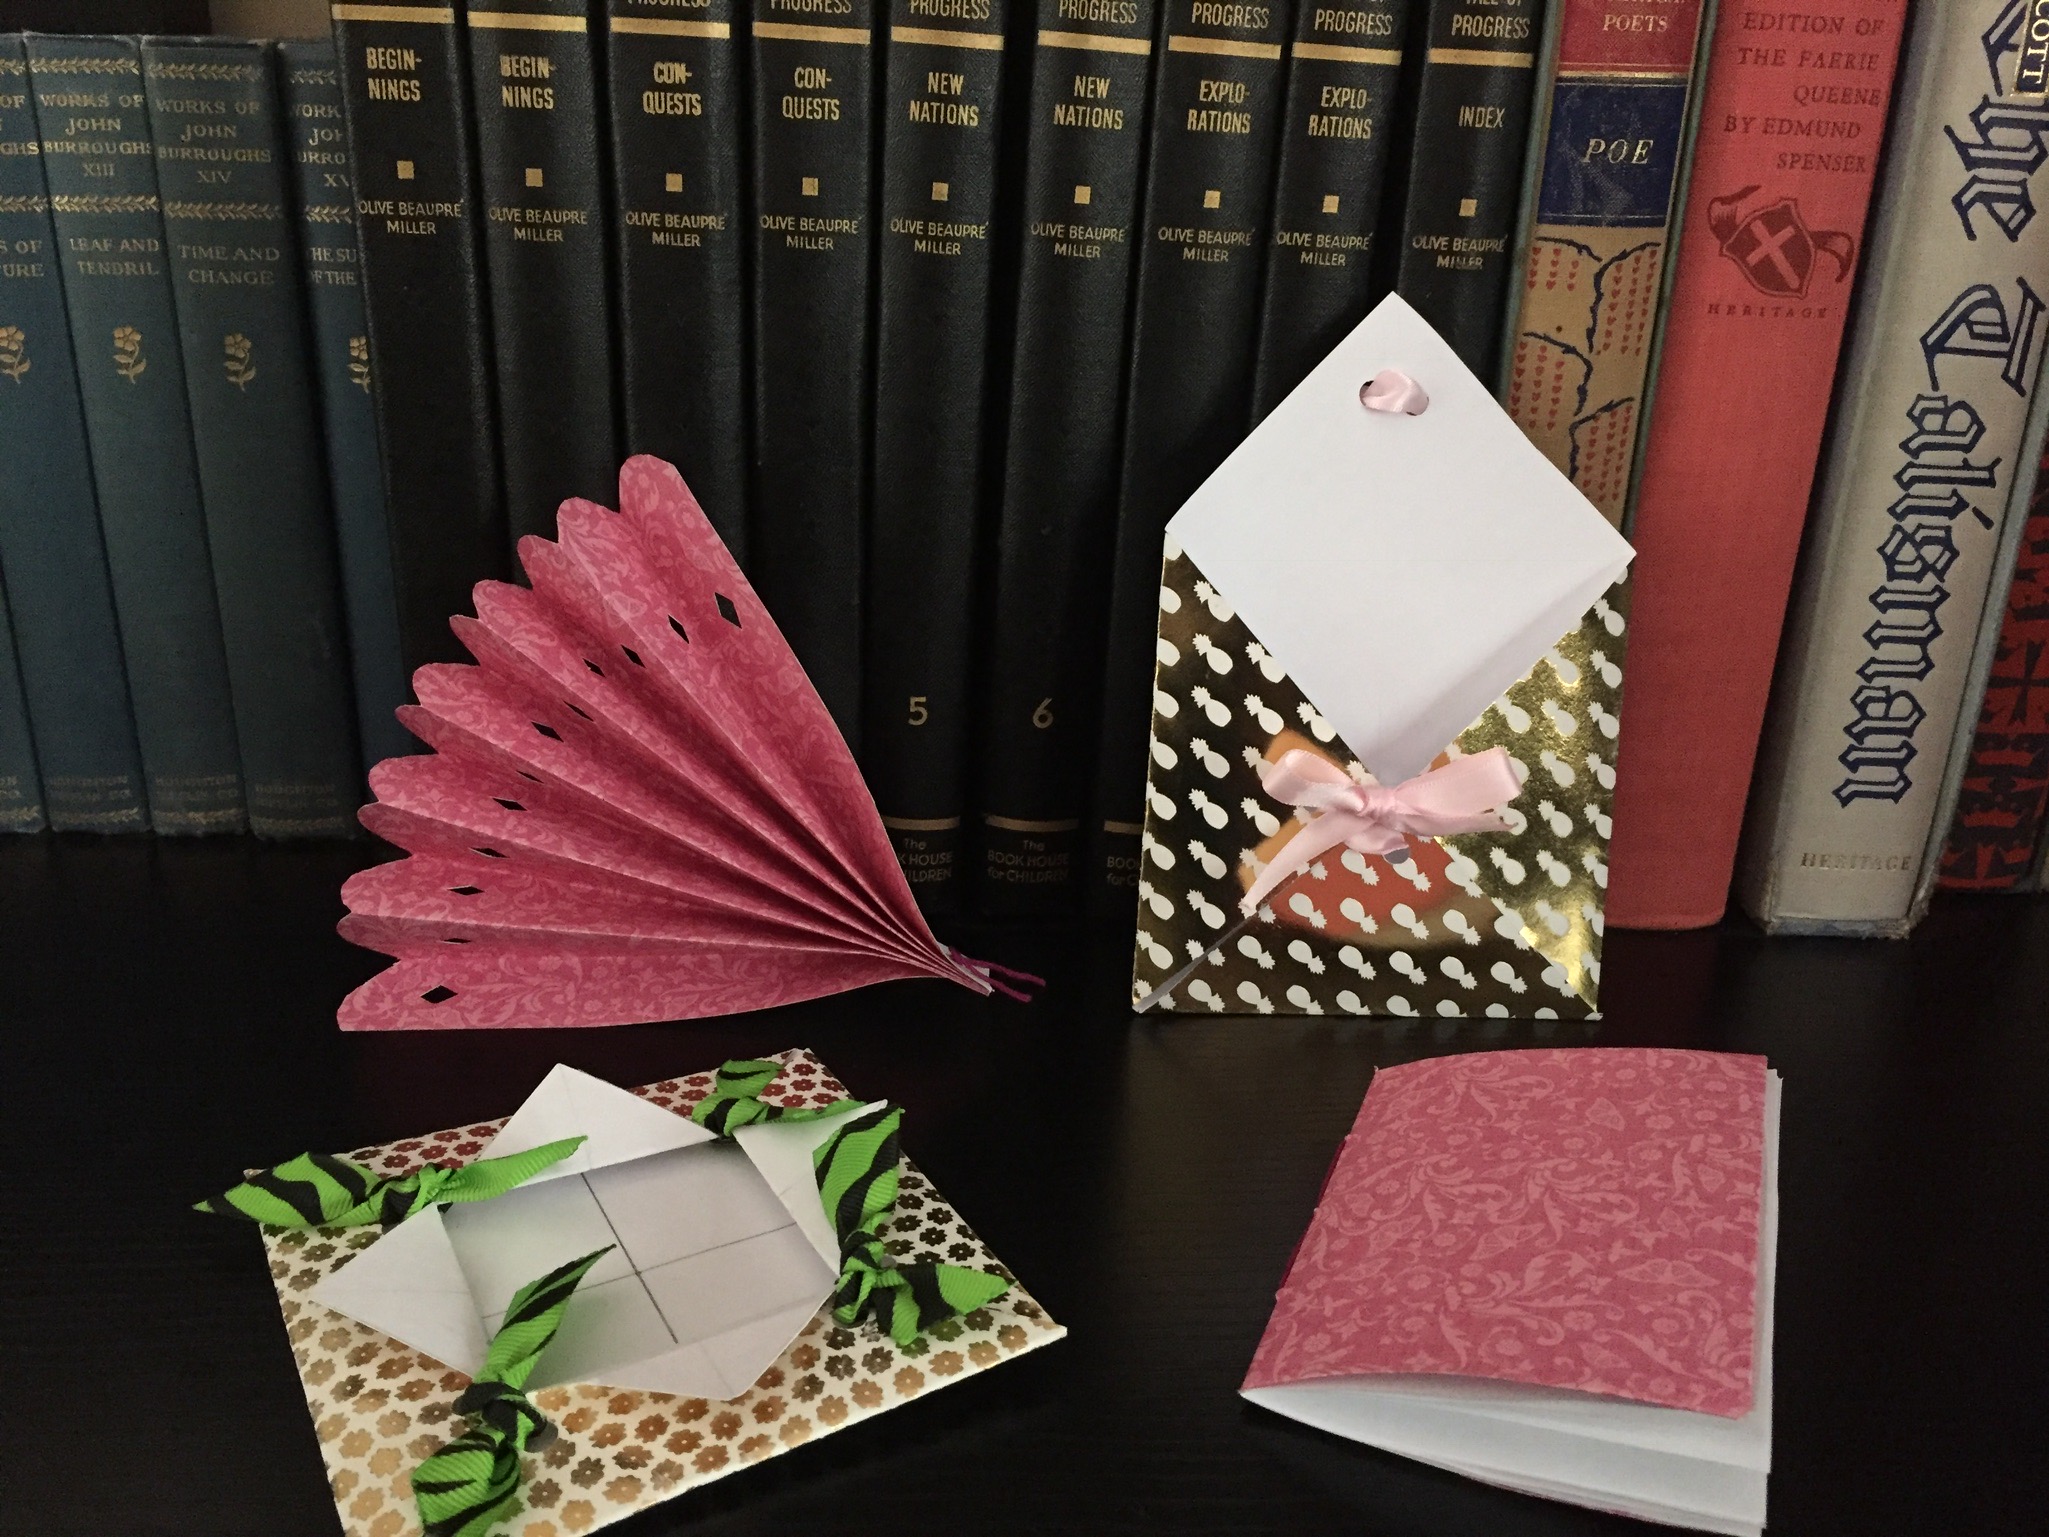
The last area that can be improved upon in Paper Sloyd is that of “finishings.” The projects themselves don’t lend to very much creativity in design, so creativity must come in the materials chosen. I have found that using scrapbook paper, sold in pads at craft stores, with colorful ribbon and nice washi tape is enough to satisfy the child who wishes to express his personal taste. Beautiful finishings will also give more of a practical value to the objects, some of which can then be given as small gifts.
Although Paper Sloyd is meant to be used for the first three years of paper sloyd, I think years one and two give sufficient preparation for cardboard sloyd.
I hope that this article has been informative and an encouragement to make paper sloyd an important part of your child’s Work. The next post in this series will cover forms 2-4 and introduce cardboard sloyd. This is where it gets really interesting. Mr. Devonshire says, “It should be clearly understood that it is Card-board Sloyd that is considered essential for the full development of the child, and not Wood Sloyd, which is of secondary and later importance” (1905, p. 8).
References
Devonshire, J. (1905). Harmonious relations between physical training & handicrafts. In L’Umile Pianta, March, 1905 (pp. 8-11). London: Parents’ National Educational Union.
Mason, C. (1989a). Home education. Quarryville: Charlotte Mason Research & Supply.
Mason, C. (1989c). School education. Quarryville: Charlotte Mason Research & Supply.
Pennethorne, R. (1906). Cardboard sloyd. In L’Umile Pianta, April, 1906 (pp. 3-6). London: Parents’ National Educational Union.
Russell, C. (1894). On some aspects of slöjd. In The Parents’ Review, volume 4 (pp. 321-333). London: Parents’ National Educational Union.
Swannell, M. (n.d.). Paper Modelling. London: George Philip & Son, Ltd.
Subscribe: Apple Podcasts | Spotify | Amazon Music
39 Replies to “Teaching Paper Sloyd”
Brittney, I so appreciate your follow-up article for a variety of reasons but mainly because it shows how the methods employed rest firmly upon principles. The options you’ve given for a modern reader are not divorced from principles, either, in an “anything goes” attitude. It’s wonderfully practical while working toward a definite progression in attainments.
Hearing your personal experience in gaining such precision in your professional training was also so interesting. For anyone who thinks these are “pie in the sky” goals, my own children –now 12 and 15– were able to draw precise angles without a protractor from their work in practical geometry that followed their work in sloyd. We are now looking forward to additional sloyd training this year with your fun IG photos as added impetus.
Thank you, Richele, for commenting and sharing your own experience with practical geometry after a foundation of sloyd. I look forward to seeing this progression in my own family as we continue forward with your guide, Mathematics, An Instrument for Living Teaching from SCM and our sloyd lessons. The way Mason’s principles and practices work together, across subjects and over time, is truly remarkable.
Yes, this is fantastic, and further helps me apply her principles across all subjects. Thank you for your hard, work Brittney! This is fascinating.
Thank you for this very interesting and informative article, Brittney! Do you know if anyone is planning to reprint “Paper Modelling” and “Paper Folding” any time soon? (I found a used copy of “Paper Modelling” but it was quite expensive.) The ideas you shared are very intriguing and it would be fun to have those books. 🙂
I’m glad you enjoyed the post, Lisa! I am working with Living Library Press to have Paper Modelling, by M. Swannell and Cardboard Modelling, by William Heaton reprinted. They are still a few months out, but we will let you know when they are ready. I haven’t been able to find access to Paper Folding, but I am still keeping my eyes out for it!
Paper Modelling has now been reprinted by Living Library Press.
Thank you so much for your research. What amazes and comforts me most these days is that my intuition is often confirmed by Mason’s methods.
I began using the aforementioned Paper Sloyd book that so many of us find first, and was surprised at the recommendation that the child measure and cut their own 6×6 squares. I knew that my 7 year old would not be able to do this without frustration and discouragement. I went ahead and made them myself and our first project was a complete success–so much so that all three boys declared Paper Sloyd their new favorite!
I will enjoy looking through your other recommendations! Thank you again!
Becca, I am often comforted by the same thing. If you are grounded in Mason’s principles, a careful study of *her* actual practices reveals that they are the natural result of the principles lived out. I am so glad your intuition helped you to see what was best for your child and safeguard the desire to make and do. And your boys are really going to love cardboard sloyd when they are ready!
I recognize Mr. Ruskin in the gorgeous background of your first pic!! Already unpacked the most important things, ehh? =)
Nicole, I’m sure you know well the order of importance in unpacking, books first, then kitchen and everything else as there is time! 😉
Thank you, so helpful! Bookmarking!
Amy, I’m so happy this was helpful to you! I’d love to see some action shots on IG sometime!
Hi! Thank you for this article — so glad I read it before starting our first year with CM homeschooling. My son is 6.5 and will be starting Year 1B. Am I clear then that your recommendation would be to use an origami book (I wish the one you recommended was available in hard copy since I don’t own a Kindle!) with the principles outlined in your first article? Or should I stay with Rich’s book, just starting with the 6 X 6 square already made? What would you do if you were in my shoes? Thank you!
Hi Stephanie! I like that book because it has some interesting projects similar to the ones in the book for form 1a, Paper Modelling, but a beginning origami book would work just as well. If I were you, I would go to a book store or read the reviews on Amazon to find a book with projects that are not too difficult, but are also interesting to my student. There are other nice origami books out there, that’s just the one I ended up with. ?
Do you have any opinion on Everett Schwartz’s book called, “Sloyd: Or Educational Manual Training with Paper, Cardboard, Wood, and Iron for Primary, Grammar, and High Schools.”? I have it and wondered if it can be of use for us and when. Thanks!
Hello Laura,
I have looked at the Schwartz. The first few paper projects are similar to the Rich book, but then the diagrams get fairly complicated. I haven’t tried to do any of the models with circles, so I recommend trying them first to decide whether they would be too difficult for your student. The cardboard portion is certainly an option if you are ready for that now, but they are primarily geometric shapes. The book Mason used for cardboard made useful objects over shapes and that is part of why she used is from the earliest programmes we have to the latest. It also included binding and other preparations for bookbinding. If you give it a shot, please let me know how it goes!
Thank you for sharing all your research!
Could you recommend any specific type of paper to use for sloyd?
Thank you for this great article. For those looking for Maying Soong’s book referred to, it looks like it has been reprinted by Dover under a new name, “Chinese Paper Folding for Beginners,” and is available for a reasonable price through both Dover and Amazon. I don’t have them both in hand, but I used the “Look Inside” feature on Amazon for both books.
Dawn,
I am so glad you enjoyed the article. Thank you for looking into that book and comparing. I wish publishers wouldn’t re-name books.
Thank you so much for that update!
My book came today, but I want to share that I also ordered and really like, “Easy Origami,” by John Montroll. It is all 6×6 projects, unlike Soong which uses various sizes of paper. I’m looking forward to trying out both books.
Thank you for the additional recommendation, Dawn.
Regarding decorations…what have you found to work well? I see ribbon in the pictures. What glue has worked well?
The paper itself is our main decoration, but we also like colorful washi tape. I’ve seen people use stickers as well. I suppose you could use stamps and use scissors to cut different shapes on the free edges. I like Elmer’s CraftBond glue stick.
I am just now getting started with my little ones on paper folding and there are too many origami paper options. I am at a loss for what is best to buy. Can you recommend a good source?
Thanks so much!
Hi Tina,
You are in for some fun to come! I linked the book my family enjoys in the section under 1b. In the comments by Dawn Rhymer she shares that she found the same book republished under another title. We also have several other origami books published by Dover, including the second book recommended in the comments from Dawn. Probably anything geared towards beginners will work. I hope that helps.
Brittney, Thanks so much! I actually just got the book, The Art of Chinese Paper Folding for young and old, Soong from our library. I believe that is the correct one? What origami paper is best to buy for use with this book?
Tina, I’m glad you were able to find the book. Any origami paper will do. I let my children pick out the patterns and colors they like.
Brittney, I have another question for you! My 8 and 6 year old now have declared that this is their favorite thing to do! In the afternoon, they keep asking for more paper as they want to do more. I am wondering about providing these materials for them to work to their heart’s content. My 8 year old is able to read some of the book on his own. When should I let him have the book and just start working on his own in his free time? However, we would also be using the book during out school lessons. Any thoughts?
Tina, that is wonderful news! I allow my 9 and 6 year olds to repeat any project we have already done during lessons on their own, but I tell them they have to have a plan for how to use the project. Simply so sloyd doesn’t start to cover every flat surface in the house. With Christmas coming maybe they can get creative with gift ideas or containers to hold gifts. I also encourage the children to try different size paper and see how else they might customize or modify their work.
I’m so glad you guys are having fun with sloyd!
Brittney, I just read through this in preparation for our weekly co-op, and it occurred to me that you spoke to Form 1, but not Form 2. What do you suggest for Form 2 students? What if they’ve never done Sloyd before? What if they had a year of the Rich book, and I’m doing Paper Modelling this year?
Hi Laura. Form 2 is covered in the following article on cardboard sloyd. But sloyd is a skill based subject, so children should always start in the beginning (of the skill set) and move forward no matter their age. Older students are likely to move faster through the projects. If students have already done a year of Paper Sloyd by Rich you could still start in the beginning of Paper Modelling. If you want to make the projects more challenging you could ask them to cut out their own squares or encourage them to experiment with different s size starting squares. Living Library Press is working to republish a cardboard sloyd book within the next few months which is used after Paper Modelling. I hope you and your students have a joyful year of paper sloyd!
Hi again! Thank you for the reply. I’m excited about the cardboard Sloyd book coming out! My next question is, for planning for a group of students working through projects, what is a good estimate of the rate of progression through the Swannell book? 1 project per 20 minutes? 1 project per 40 minutes? I also understand that the older kids will move faster. Makes my head dizzy thinking of trying to plan for kids 1b through form 3 in one room! Any advice at all you might have on this would be awesome.
Thanks!
Laura
Hi Laura,
I’m afraid I can’t offer any definite answers to your questions. I have not taught sloyd in a co-op setting. Handicrafts were scheduled for 30 minutes in form 1, but they would have been done in the afternoon after that. Students were given a certain number of projects to complete for the term, but no times are mentioned. After teaching everyone how to read the diagrams I would let everyone work at their own pace for the duration of the class. Those who finish with extra time should be encouraged to try modifying the same model or move on to the next. Those who do not finish will pick up where they left off or finish at home, bringing completed work to show the teacher. I hope you find a way to make things run smoothly.
This is all so helpful, thank you so much! I have Paper Sloyd by Rich but am wondering if I should also get Paper Modelling by M. Swannell I am working with a 1B student 6.5 years old. Moving to 1A this Fall. No slyod experience and a bit of folding and cutting experience (just what she does on her own for fun) I am just trying to decide if Paper Sloyd by Rich is all I need.
Can you direct me to where I could find a similar knife with a wooden handle? I have seen it in some of your pictures and videos. Thank you!
Here’s an example on amazon.com. I hope this helps!
Thank you! That exactly what I was looking at but it is so nice to have the confirmation that I was on the right track!
Thank you SO much for the paper sloyd videos you have posted! My son really enjoys it and takes to it much more easily than I. Please keep the videos coming….they are a tremendous help for a visual learner like myself!